![]()
| GR Manual Storm Tracks v4.2 | Written by Derek | Updates @ https://www.FreeLightning.com
Run Setup.exe and complete the installation.
*Important* Right-click the GRMST icon and select properties. Then select compatibility and check the "run this program as Admin" checkbox.
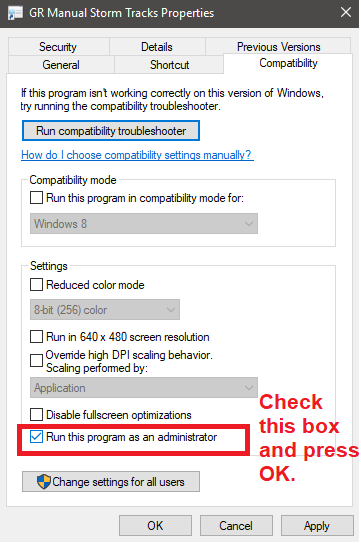
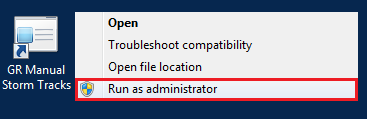
*Important* If you don't set it like above under properties, just make sure you ALWAYS right-click the GRMST icon and Run as Administrator.
Run GR Manual Storm Tracks from the Desktop Icon or the Start Menu -> Programs -> GR Manual Storm Tracks
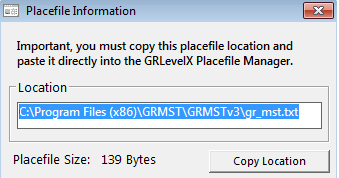
Once
you have opened GRMST for the first time, go to the Placefile
menu and click Info.
This will show the correct placefile
location, Load
this placefile in your GRLevelX
Placefile Manager.
Windows Vista, Windows
7 and newer Operating Systems:
C:\Program
Files (x86)\GRMST\GRMSTv3\gr_mst.txt
Windows XP and
older Operating Systems:
C:\Program
Files\GRMST\GRMSTv3\gr_mst.txt
These are just example paths above, please go to the Placefile menu and click Info to get the exact place file location.
Copy and paste it into GRLevelX Placefile Manager.
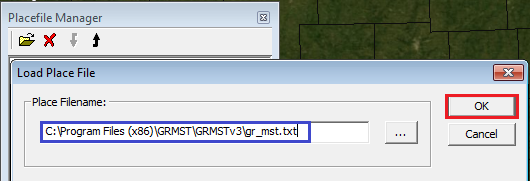
Once
you have the GRMST placefile loaded you can now draw
storm tracks.
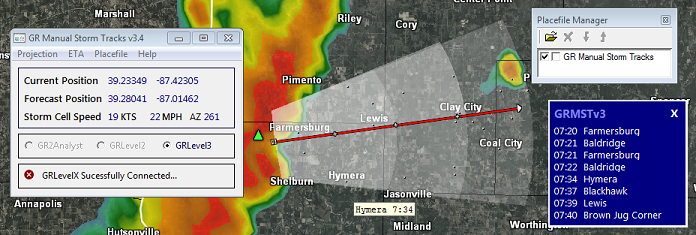
A storm track requires
2 positions chosen by you, a start position and a forecast position.
Move
your mouse on the GR radar screen to a storm cell, press the (Q) key once.
Now move your
mouse to a forecast position, press the (Q) key once again.
The storm track is now complete and should be visible.
Press
the (X) key to erase all
storm tracks.
Press the (S) key to show ETA information.
*Tip* You will want to
keep the placefile "gr_mst.txt" near the
top in your placefile manager,
due to the rapid one second refesh
rate.
*Tip* You can disable/enable
the HotKey logger by clicking on the red/green status icons.
This is useful in preventing accidental storm track projections and or erasing
of storm tracks.
Example, after you draw a storm track, click on the green status icon, it will now turn red and all HotKey will be ignored.
Simply click on the red status icon to enable the HotKeys once again.
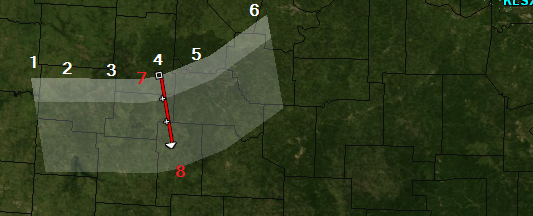
BOW
Echo Projections require 8 user selected positions, see the
example image below.
Bow Echo ETA's are currently disabled; the feature is under construction yet
again.
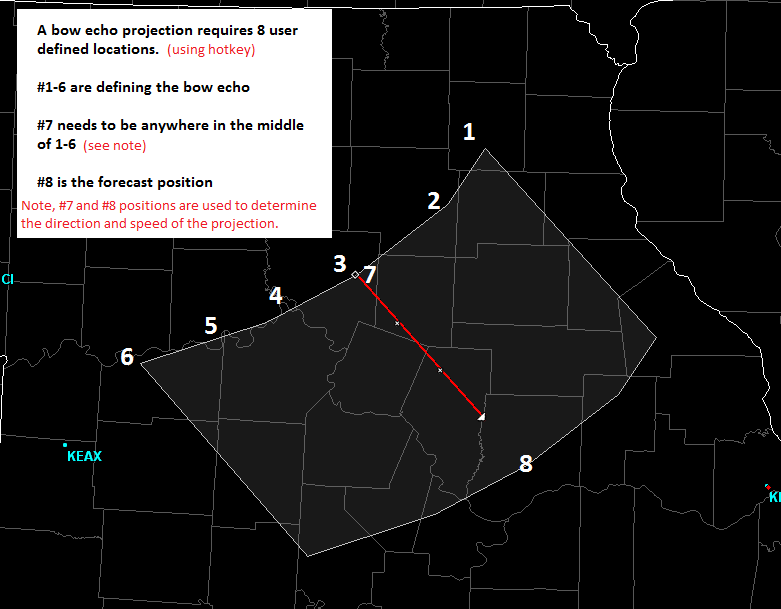
Points 1-6 define a bow echo, points 7 and 8 define the
speed and direction only.
Points 7 and 8 do not define the structure of the bow echo.
Trial and Error is the easiest way to learn, give it a try.
GR Manual Storm Tracks is 100% virus and malware FREE!
I'm strongly against malware and will never add
harmful/annoying code to any of my projects. I encourage everyone to use a
virus scanner.
Here
are the scan results of GRMST3.exe using VirusTotal.com, which scans with
the newest information and the leading virus detection software.
VirusTotal.com used 47 scanners and
only displayed one detection, from Comodo,
which is a false positive.